
1. Sharp GP2Y1014AU0F
a. Overview
The GP2Y1014AU0F is one of Sharp’s latest models in the lineup of PM (particulate matter) dust sensors. Designed for use in home air purifiers, room monitors, and portable air quality monitors, this sensor operates based on the principle of light scattering. It provides a voltage output, enabling the measurement of dust density in the air.

Figure 1: Sharp GP2Y1014AU0F
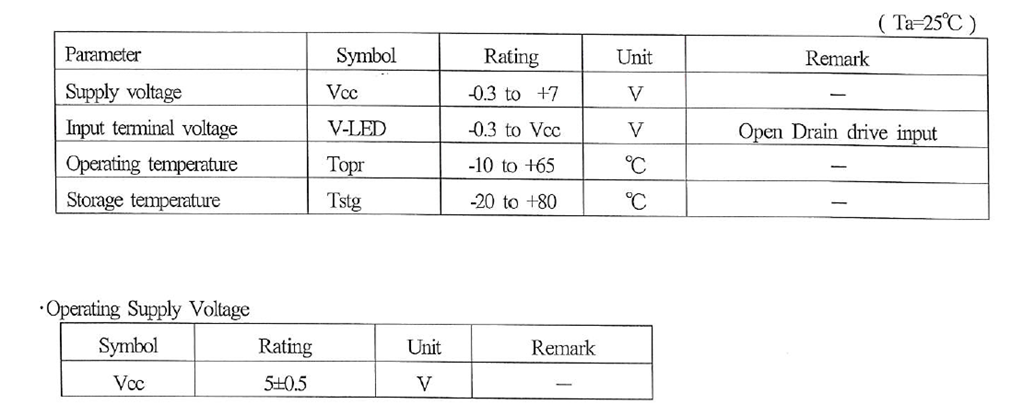
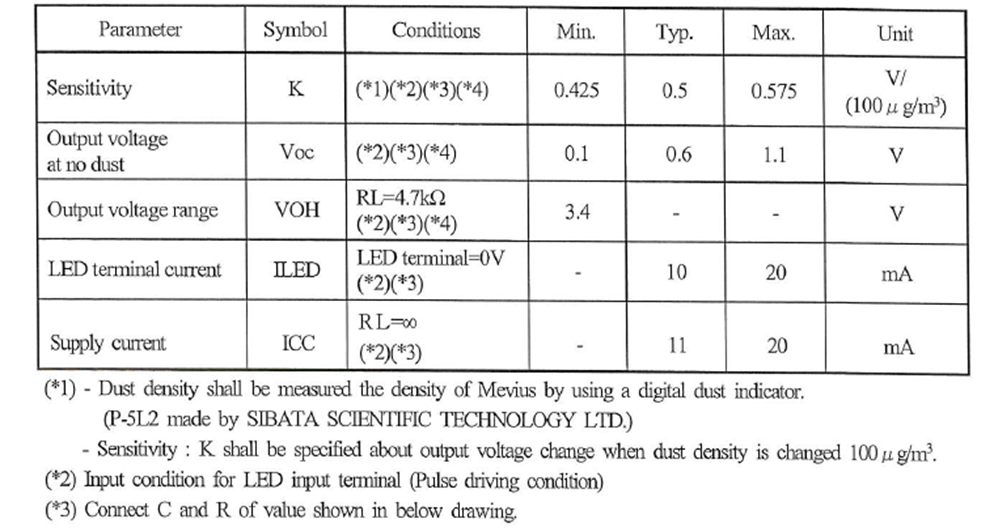
b. Technical Specifications
2. Arduino
a. Overview
The Arduino Uno is a microcontroller board built around the ATmega328P. It features 14 digital input/output pins (with 6 capable of PWM output), 6 analog inputs, a 16 MHz ceramic resonator (CSTCE16M0V53-R0), a USB connection, a power jack, an ICSP header, and a reset button. The board encompasses all the necessary components to support the microcontroller.
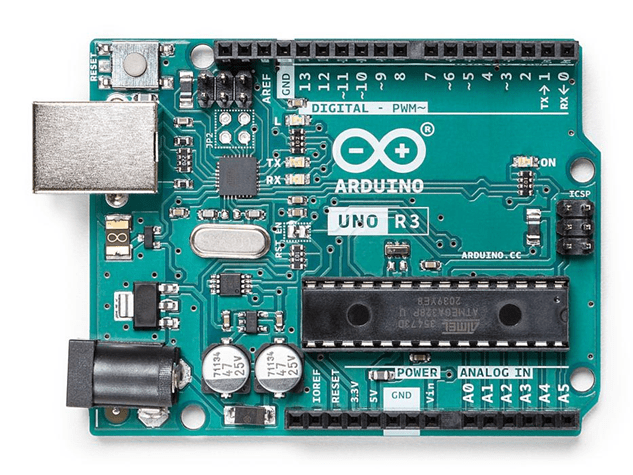
Figure 2. Arduino board
b. Technical Specifications
- Board Name: Arduino UNO R3
- SKU: A000066
- Microcontroller: ATmega328P
- USB Connector: USB-B
- Pins:
- Built-in LED Pin: 13
- Digital I/O Pins: 14
- Analog Input Pins: 6
- PWM Pins: 6
- Communication:
- UART: Yes
- I2C: Yes
- SPI: Yes
- Power:
- Circuit Operating Voltage: 5V
- Input Voltage (Recommended): 7-12V
- Input Voltage (Limit): 6-20V
- Supported Battery: 9V battery
- Battery Connector: Power jack
- DC Current per I/O Pin: 20 mA
- DC Current for 3.3V Pin: 50 mA
- Clock Speed:
- Main Processor: ATmega328P 16 MHz
- USB-Serial Processor: ATmega16U2 16 MHz
- Memory:
- ATmega328P: 2KB SRAM, 32KB FLASH, 1KB EEPROM
- Dimensions:
- Weight: 25 g
- Width: 53.4 mm
- Length: 68.6 mm
3. Using GP2Y1014AU0F with Arduino
a. LED Pulse
To operate the sensor’s LED, a circuit requires a 150-ohm resistor and a 220 uF capacitor to pulse the LED on and off. The LED should be pulsed on once every 10ms, with a pulse duration of 0.32ms. After turning on the LED, sampling should occur 280 microseconds later.
b. Arduino Circuit

Figure 3. Schematic Arduino circuit
c. Arduino Sketch
The demo source code can be found in the following link:
GitHub – Sharp Sensor Demos
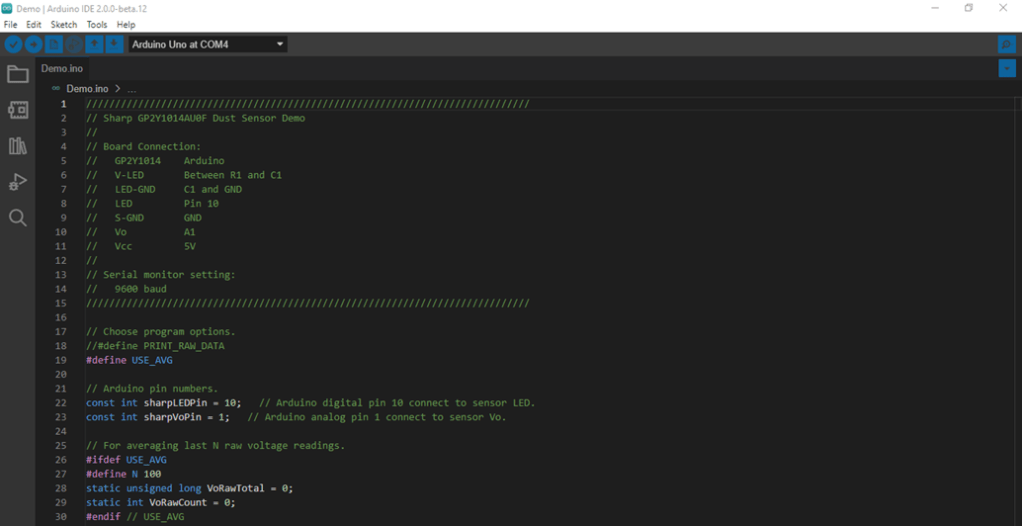
Figure 4. Programming hardware using Arduino IDE
4. Data Acquisition
a. Arduino IDE
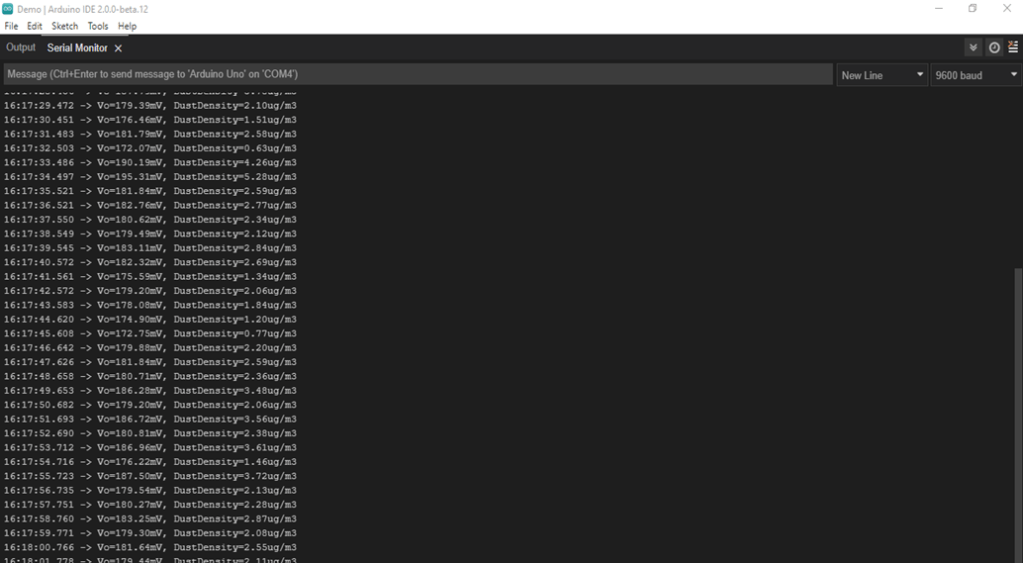
Figure 5. Monitoring data from serial monitor tool in Arduino IDE
b. C# Program
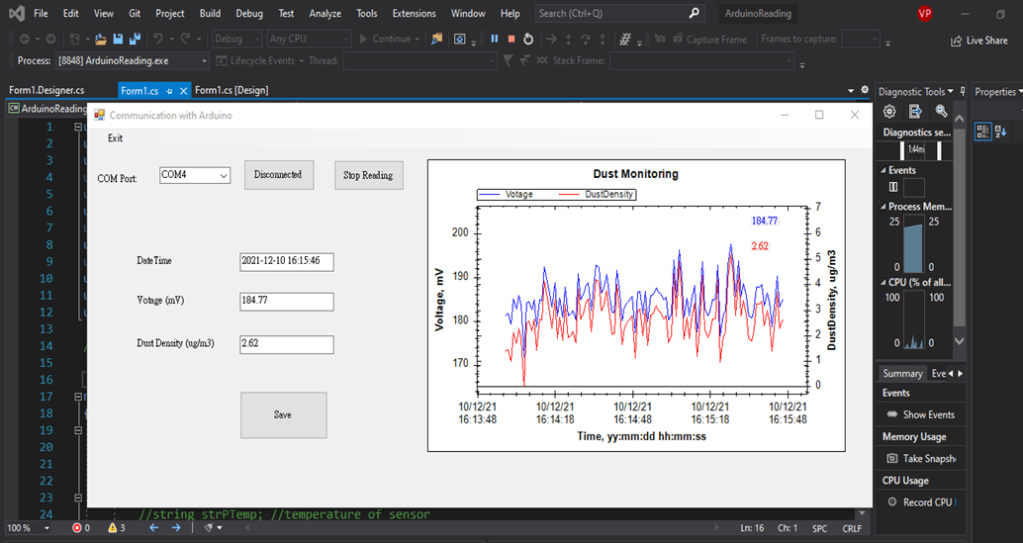
Figure 6. Monitoring data from C# window form application
5. Conclusions
- The GP2Y1014AU0F sensor and Arduino demonstrate stable performance after powering the board. For precise monitoring results, it’s advisable to conduct further tests for offset correction, Voc, and sensitivity K calibration.
- The Arduino UNO, a low-power board with an average current consumption of approximately 50 mA, stands as the most widely used and documented board in the Arduino family.
Please feel free to contact me if you have any questions or would like to contribute to the ongoing projects.
In conclusion, I hope you enjoy reading this article! Have a great day, everyone!
Here is the demonstration video:
